How to Clean and Fillet a Crappie
You've spent a fantastic day out on a Nebraska lake or river, the crappie bite was on, and now your cooler is full of those delicious panfish. There's just one hurdle before dinner: cleaning and filleting them. For many anglers, especially those new to processing their catch, this step can feel daunting, messy, and even a bit intimidating. But fear not, because with a few simple tools and a clear, step-by-step approach, you'll be filleting crappie like a seasoned pro, turning your fresh catch into perfect, boneless fillets ready for the pan.
Gathering Your Essential Crappie Cleaning Tools
Before you even think about making the first cut, having the right tools laid out and ready will make the entire process smoother, safer, and much more efficient. Trust me, trying to make do with a dull kitchen knife or a flimsy cutting board is a recipe for frustration and potential injury. Investing a little in your cleaning station pays off big time.
First and foremost, you absolutely need a good fillet knife. This isn't just any knife; a proper fillet knife has a thin, flexible blade, typically ranging from 6 to 9 inches, that allows you to maneuver around bones and separate the meat cleanly. Blade sharpness is paramount. A dull knife will tear the meat, make extra work, and is actually more dangerous because you'll be applying more pressure. Consider something with a comfortable, non-slip handle, especially since your hands will get wet and slick. You can find excellent options on Amazon, often in sets that include a sharpening stone.
Next up, a sturdy cutting board. This might seem obvious, but a small, wobbly board is just asking for trouble. Look for one that's large enough to comfortably hold a crappie, with a non-slip base or feet. Many dedicated fish cleaning boards even come with a clamp to hold the fish's tail steady, which is incredibly helpful, particularly when you're just starting out. You want a surface that won't absorb fish odors and is easy to clean and sanitize afterward.
A pair of fish-cleaning gloves can also be a game-changer. These aren't your typical winter gloves; they're usually cut-resistant, offering protection from slips and accidental nicks from the knife or the crappie's sharp dorsal fins. Plus, they improve your grip on slimy fish. Some folks also like to use a simple pair of heavy-duty kitchen gloves to keep their hands from getting too messy, but the cut-resistant ones are worth their weight in gold for safety.
Finally, you'll want a few other odds and ends. A small, stiff brush, like a vegetable brush, can be useful if you plan to scale your crappie (though most anglers skin them when filleting). A couple of large bowls or tubs are indispensable: one for the cleaned fillets, and another for the carcasses. Having a steady stream of water nearby, whether it's a garden hose or a sink, for rinsing your hands and the fish as you go, will maintain cleanliness. And don't forget a way to dispose of the scraps responsibly – a trash bag or a designated bucket. Keeping everything organized helps prevent cross-contamination and makes cleanup a breeze. Many people find having a dedicated setup that they can use near an outdoor spigot or on a picnic table makes the whole process much more enjoyable than trying to do it in a cramped kitchen. For those serious about quick processing, an electric fillet knife is another excellent tool that many anglers rave about for its speed and efficiency, especially with a large pile of fish. You can find various models on Amazon that offer different power and blade options.
A Step-by-Step Guide to Filleting Crappie
Now that your workstation is ready, let's get down to the actual filleting. This method focuses on creating boneless, skinless fillets, which is how most people prefer their crappie. Practice makes perfect, so don't get discouraged if your first few aren't pristine – they'll still taste amazing!
Step 1: The Initial Cut Behind the Gill Plate
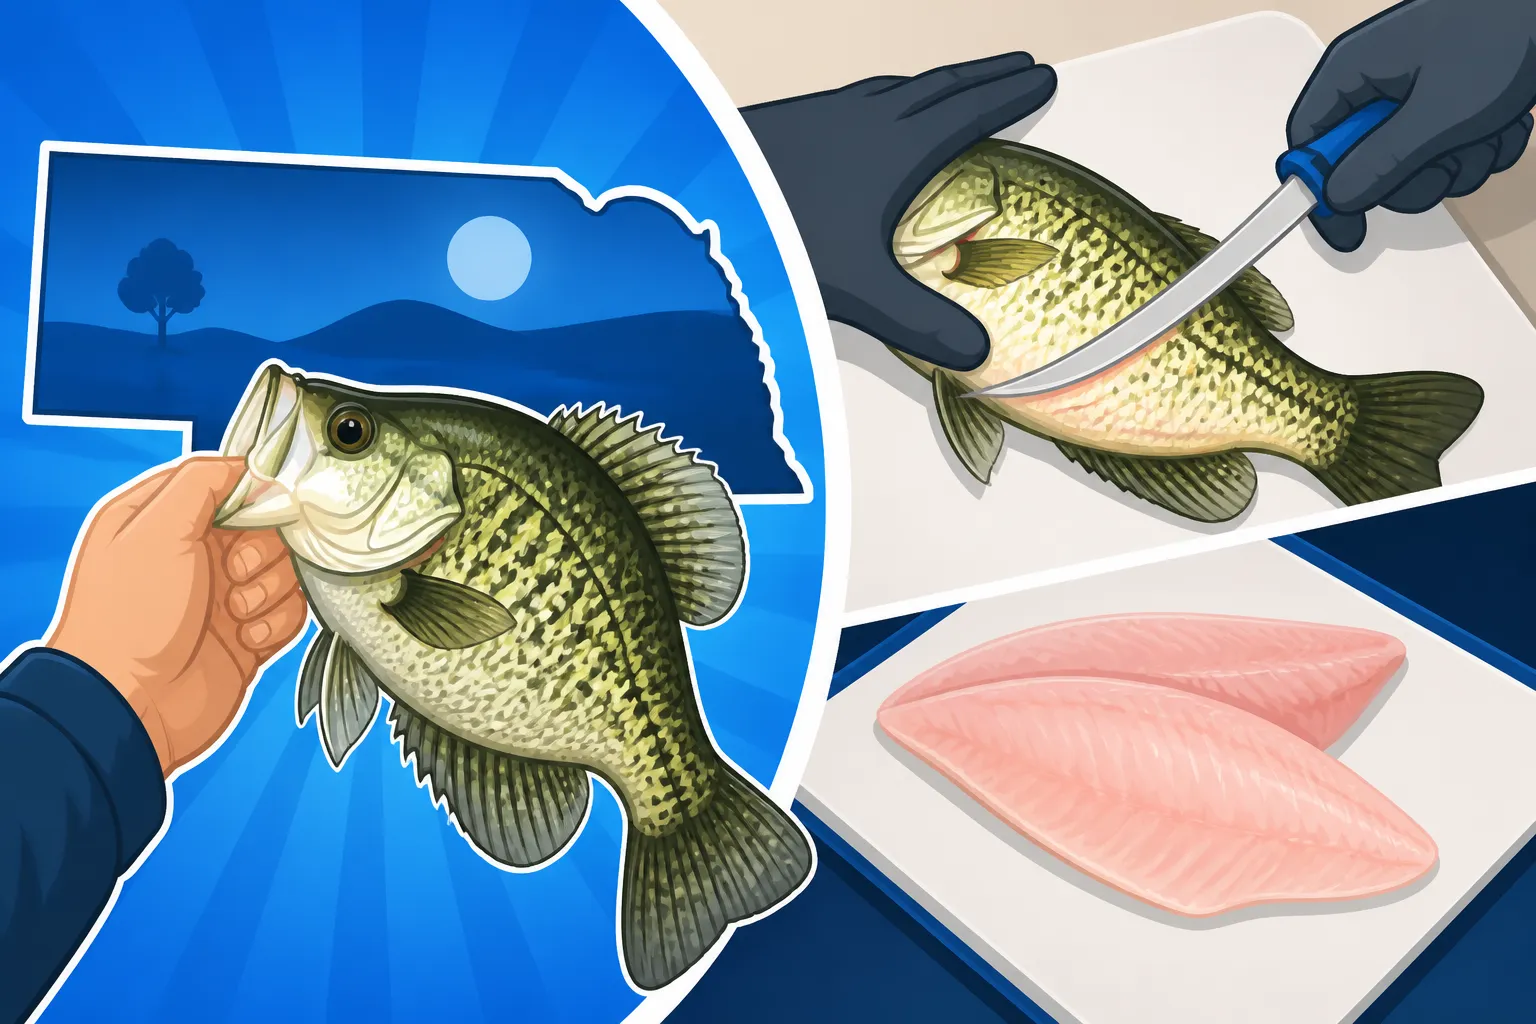
Place your crappie on the cutting board, belly facing you or slightly angled away. Hold the fish firmly by the head. Take your sharp fillet knife and make a vertical cut directly behind the gill plate, down to the backbone. You're cutting through the flesh, but not through the spine. You want to feel the blade hit bone. This cut should extend from the top of the fish's back to just above its belly, stopping before you cut into the belly cavity. This initial cut establishes the starting point for separating the fillet.
Step 2: Cutting Along the Backbone
With the first cut made, turn your knife so the blade is flat against the backbone. Carefully slide the knife horizontally along the spine, moving from the head towards the tail. Keep the blade pressed against the backbone, using it as a guide. The goal here is to remove as much meat as possible from the bones, so maintain a shallow angle. You'll feel the ribs as you go – just glide over them. Continue this cut until you reach the tail. Instead of cutting the fillet completely off, leave a small piece of skin attached at the tail end. This "hinge" will make the next step much easier.
Step 3: Removing the Rib Bones
Now you have a nearly detached fillet, still connected at the tail, with the rib cage bones exposed. Lay the fillet skin-side down on the cutting board. Identify the line where the rib bones meet the flesh. Insert your knife just under the rib bones, keeping the blade flat and angled slightly upwards. Carefully slice along the underside of the ribs, working your way from the thicker end of the fillet towards the tail. The flexibility of a good fillet knife really shines here, allowing you to contour around the bones and lift them off, leaving a clean piece of meat. You can discard the rib cage section with the rest of the carcass.
Step 4: Skinning the Fillet
With the ribs removed, your fillet is still attached at the tail by that small skin-hinge. Lay the fillet, skin-side down, on the cutting board. Grip the tail end of the skin firmly with your non-dominant hand. With your fillet knife, make a small cut to separate the meat from the skin at the tail, creating a small flap of skin that you can hold. Now, holding the knife blade at a very shallow angle (almost parallel to the board), carefully slide the knife forward, wiggling it slightly, while pulling the skin tightly in the opposite direction. The goal is to separate the meat from the skin cleanly, leaving the skin behind on the board. This step often takes a bit of practice to get a smooth, clean separation. If you're struggling, consider the purchase of a good quality skinning tool, easily found online, which can make this step much simpler.
Step 5: Repeating on the Other Side and Final Inspection
Flip the crappie over and repeat steps 1-4 for the second fillet. Once both fillets are off, give them a quick rinse under cold water to remove any lingering scales or bits of bone. Run your fingers over both sides of each fillet to check for any missed pin bones or small pieces of skin. Sometimes, especially with larger crappie, there might be a "lateral line" of small bones running down the center of the fillet. These are usually soft enough to cook down, but if you prefer, you can make a small V-cut to remove them. You'll soon have a pile of beautiful, boneless, skinless crappie fillets ready for your favorite recipe! Remember, the more crappie you clean, the faster and more efficient you'll become. Practice truly does make perfect. Many anglers find watching a video demonstration helpful, but these written steps break down the tactile experience.
Optimizing for Cleanliness and Efficiency
Cleaning fish can be a messy job, but with a few smart strategies, you can minimize the mess and maximize your efficiency, turning a chore into a satisfying part of the fishing experience.
Maintain Sharpness: We talked about a sharp knife, but it's worth reiterating. Even the best knives lose their edge with use. Keep a small sharpening steel or stone handy and give your blade a few swipes periodically, especially if you're processing a large batch of fish. A truly sharp knife glides through meat, making cleaner cuts and reducing the effort required. It also significantly lowers the risk of slips and cuts. Think of it like a chef in a busy kitchen – they're always touching up their knives.
Setting Up Your Station: Consider a dedicated outdoor cleaning station. This could be as simple as a sturdy folding table near a garden hose, or a more elaborate setup with a dedicated cleaning board and sink. Doing it outdoors means less mess in your kitchen and easier cleanup. Lay down newspaper or a tarp underneath your cutting board to catch any drips or scraps, which can then be easily rolled up and discarded. This is especially helpful if you're cleaning fish at a campsite or cabin in a Nebraska State Recreation Area like Fremont Lakes State Recreation Area Fishing.
The Water Factor: A constant, gentle stream of cold water is your best friend. Use it to rinse the fish before you start, to rinse your hands periodically, and to rinse the fillets once they're off the bone. Rinsing removes blood, slime, and any stray scales, which not only improves the final product but also makes the cleaning process less slippery and more pleasant. Have designated containers: one for your clean fillets (maybe a bowl of ice water to keep them firm), and another for the carcasses and offal. Keeping things separated prevents cross-contamination and makes discarding scraps much simpler. For larger hauls, a cooler filled with ice can keep your unprocessed fish fresh while you work, or hold finished fillets before packaging.
Crappie Specific Considerations: Crappie have relatively thin, delicate skin compared to, say, a catfish. This makes skinning them fairly straightforward once you get the hang of it. They also have fine, sharp dorsal and anal fin spines, so handle them with care, especially during the initial placement on the board. Some anglers will actually clip off these spiny fins with a pair of robust kitchen shears before beginning to fillet, just to make handling safer. This is particularly useful if you're working with a feisty batch of Nebraska Crappie Daily Limit fish.
Responsible Disposal: Never, ever discard fish guts or carcasses into the lake or river you just fished. This can spread disease, attract unwanted scavengers, and is generally bad etiquette and illegal in most places. Double-bag your scraps and dispose of them in a secure trash receptacle. If you're at a remote campsite, burying them deep away from water sources is an option, but checking local regulations is always wise. Many parks and recreation areas have specific disposal instructions.
Common Mistakes to Avoid When Cleaning Crappie
Even with the best intentions, it's easy to fall into some common traps when filleting fish. Being aware of these can help you avoid frustration and improve your results.
Mistake 1: Using a Dull Knife
This is probably the most common error. A dull knife requires more force, leading to sloppy cuts, wasted meat, and a much higher risk of the knife slipping and cutting you. It's truly a false economy to skip sharpening. If your knife isn't slicing cleanly through a piece of paper, it's too dull for fish. Many serious anglers keep a small whetstone or knife sharpener right at their cleaning station.
Mistake 2: Cutting Too Deep or Too Shallow Along the Backbone
When separating the fillet from the backbone, some beginners either angle their knife too steeply, leaving a lot of meat on the carcass, or too shallowly, cutting into the vertebral column and leaving bone shards in the fillet. The key is to keep the blade flat against the backbone, allowing the bone to guide your knife. Feel for that hard resistance and let the knife hug it closely. This takes a gentle touch and practice.
Mistake 3: Rushing the Rib Removal
The rib cage area is where a lot of valuable meat can be lost if you're not careful. Rushing this step often results in either cutting through the ribs (leaving bone in the fillet) or leaving too much meat attached to the ribs. Take your time, feel for the bone structure, and use the flexible blade of your fillet knife to carefully shave the meat off the ribs. It's a delicate dance that gets easier with each fish.
Mistake 4: Not Holding the Fish Firmly
A slippery crappie that's flopping around on the board is not only frustrating but downright dangerous. Always hold the fish firmly, especially during the initial cuts. Using a cleaning board with a tail clamp can be a lifesaver here, as can wearing those aforementioned fish cleaning gloves for a better grip. Stability equals safety and precision.
Mistake 5: Neglecting Clean-Up During the Process
Letting scales, blood, and guts accumulate around your workstation makes everything more difficult. Rinsing your knife, your hands, and even the cutting board occasionally helps maintain a cleaner environment, prevents the fish from getting too slimy, and makes the final cleanup far less onerous. Keep those dedicated bowls for fillets and scraps within easy reach. The quicker you clean as you go, the less of a "project" the final cleanup becomes.
By understanding these common pitfalls, you can proactively avoid them and make your crappie cleaning experience much more enjoyable and productive. After all, the best part of catching crappie, besides the fight, is savoring a meal of perfectly prepared fillets. Knowing How to Clean and Fillet a Walleye also comes in handy if you're targeting other popular Nebraska species.
| Step | Action | Key Tip for Crappie |
|---|---|---|
| 1 | Initial Cut Behind Gill Plate | Cut cleanly down to the backbone, stopping above the belly. Use sharp knife for a clean entry. |
| 2 | Slice Along Backbone to Tail | Keep blade flat against spine, using it as a guide. Leave skin attached at tail (the "hinge"). |
| 3 | Remove Rib Bones | Angle knife slightly upward, carefully shaving meat from ribs. Flexibility of blade is key here. |
| 4 | Skin the Fillet | Grip skin firmly at tail hinge, keep knife very shallow, and pull skin taut against the blade. |
| 5 | Repeat & Inspect | Flip fish, repeat. Rinse fillets, check for pin bones. Consider a quick chill in ice water. |
This table provides a quick reference for the steps, but remember the detailed descriptions are where the real learning happens. Soon, you'll be a crappie filleting expert, and those delicious Nebraska panfish will be ready for the frying pan in no time! Make sure to stay updated on Nebraska Fishing Daily Bag and Possession Limits to know how many crappie you can legally keep. And if you're looking for more tips on catching these tasty fish, check out How to Catch Crappie in Spring or How to Catch Crappie Around Brush Piles. For gear, don't forget to explore options for Best Fillet Knives for Cleaning Fish on Amazon.
Disclaimer
This article is for general informational purposes only and does not constitute professional advice. Laws, prices and regulations vary by location and change over time. Consult a qualified professional for guidance on your specific situation.