How to Use Side Imaging Sonar for Structure
It's incredibly frustrating to spend hours on the water, meticulously casting, only to come home empty-handed because you couldn't find where the fish were hiding. Traditional sonar can only show you what's directly beneath your boat, leaving vast areas of potential fish-holding structure unseen. This guide is here to unravel the mystery of side imaging sonar, showing you how this powerful technology can revolutionize your approach to finding hidden structure in Nebraska's diverse waters, putting you right on top of more fish.
Understanding the Basics of Side Imaging Sonar
For years, anglers relied on traditional 2D sonar, which is fantastic for showing you what's directly below. Then came down imaging, giving us a photographic view of the bottom. But the real game-changer, especially for finding structure that's off to the sides, is side imaging sonar. It's like having x-ray vision that extends out from your boat, painting a picture of the underwater world in incredible detail.
What is Side Imaging and How Does It Work?
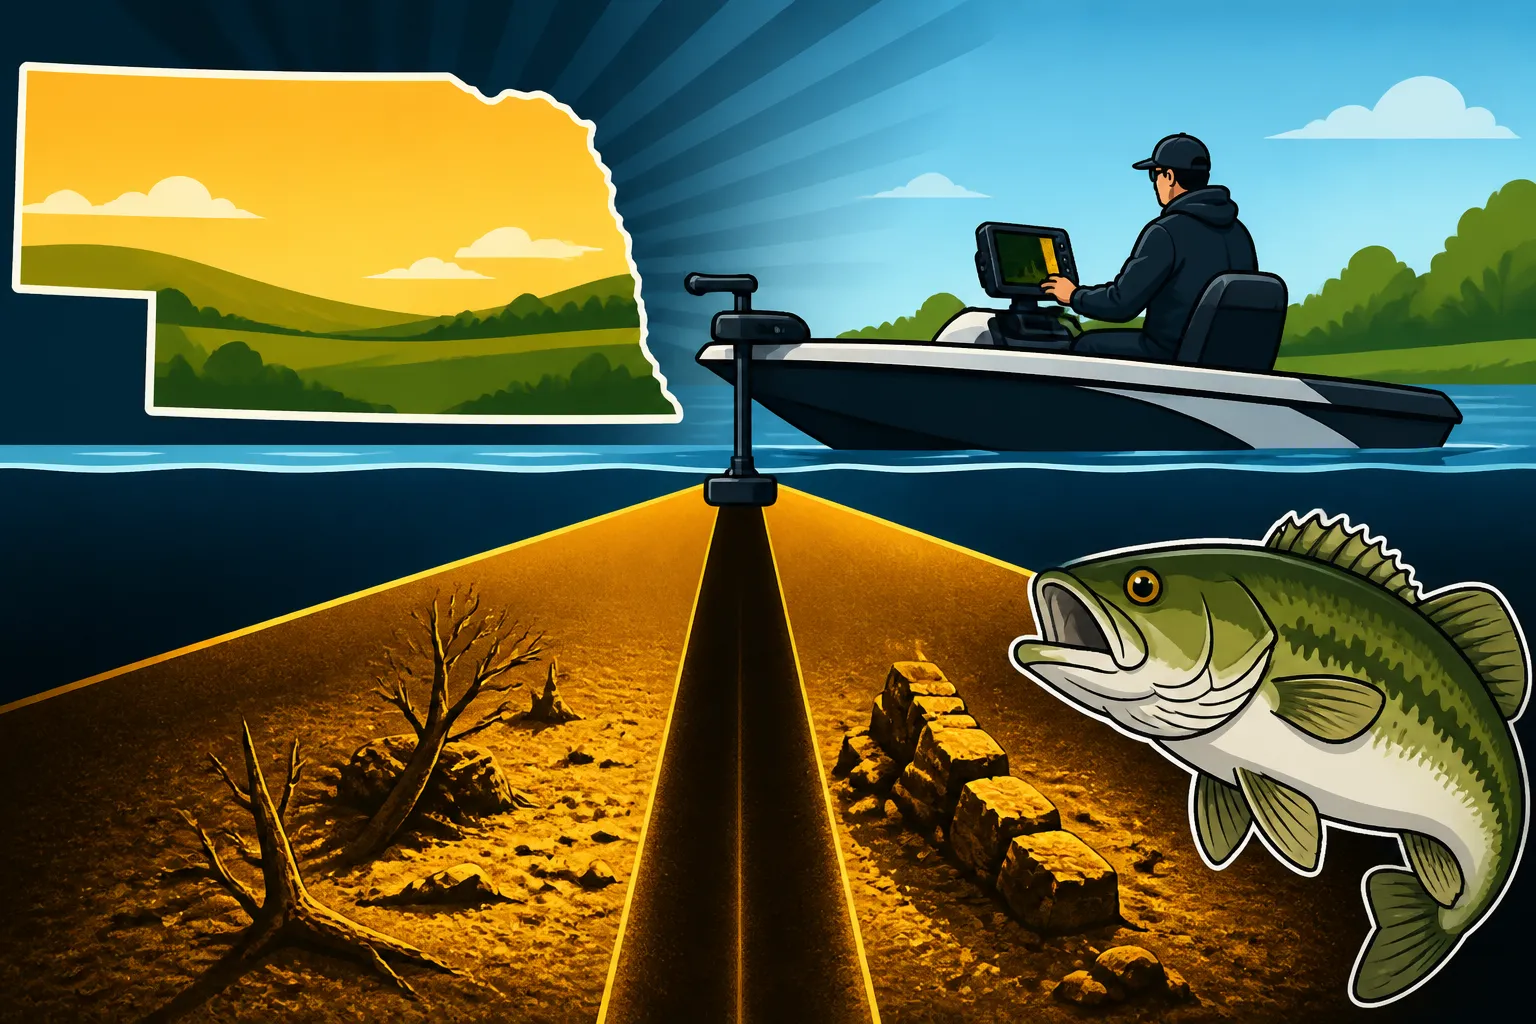
Side imaging sonar isn't just looking straight down; it's sending out super-thin sonar beams to both the port and starboard sides of your boat. Imagine a giant fan spreading out underwater as you move. These beams bounce off everything in their path – rocks, trees, humps, weed lines, even fish – and then return to the transducer. Your fish finder's processor then takes all that information and stitches it together, creating a crystal-clear, photographic-like image on your screen. Instead of just seeing a few dots under your boat, you get a panoramic view of the bottom extending out hundreds of feet to either side. It allows you to literally "see" structure far away from your boat without having to drive directly over it.
This technology works best when you're moving at a consistent, slow speed, giving the unit time to collect all the data and build that detailed image. If you're zooming across the lake, the image will be stretched and distorted, making it much harder to interpret. Think of it like a slow-motion scan, revealing secrets hidden in the murky depths. It’s particularly effective in places like Lake McConaughy, where vast underwater landscapes might hold secrets for walleye and other species.
Why Side Imaging is a Game-Changer for Structure Fishing
The biggest advantage of side imaging is its ability to scan a massive amount of water quickly and efficiently. With traditional sonar, you might drive for miles and only scan a narrow strip directly under your boat. With side imaging, you can effectively scan an area as wide as a football field in one pass, depending on your settings. This means you can find those subtle breaks, isolated rock piles, or forgotten brush piles that you would have completely missed otherwise.
It significantly reduces the amount of time you spend blindly searching and increases your time actually fishing productive spots. Imagine slowly cruising along the shoreline of Branched Oak Lake. Instead of just seeing the bank drop off, you can see a submerged road bed 75 feet to your left, complete with brush scattered along its edges. Or maybe you're exploring the Missouri River and you can clearly spot a hidden wing dam far to your right that's holding a school of catfish. This ability to scout without disturbing the fish-holding structure is invaluable. It helps you understand the underwater topography in a way that no other sonar can, providing a huge tactical advantage, especially when trying to pinpoint species that relate heavily to cover, like largemouth bass or crappie.
Setting Up and Interpreting Your Side Imaging Display
Getting the most out of your side imaging unit isn't just about turning it on. It involves a bit of tweaking and a lot of learning to "see" what the screen is trying to tell you. It can feel like learning a new language at first, but with practice, those abstract lines and blobs will transform into clear underwater landscapes.
Optimizing Settings for Clarity and Range
The default settings on many units are a good starting point, but they rarely give you the absolute best picture for your specific conditions. Here are a few key settings to tweak:
- Frequency: Most side imaging units offer a couple of frequencies, typically 455 kHz and 800 kHz, sometimes even higher. The lower frequency (455 kHz) provides greater depth and range, allowing you to see further out to the sides, but with less detail. The higher frequency (800 kHz) gives you incredibly sharp, detailed images, but with a more limited range and struggles in deeper water. For general scouting in Nebraska's shallower reservoirs or rivers, 455 kHz is often a good compromise. If you're trying to resolve fine details on a specific piece of structure, switch to 800 kHz.
- Sensitivity/Contrast: This controls how much detail the unit shows. Too low, and you'll miss faint targets. Too high, and you'll get a lot of clutter and noise. Start around the default and adjust up or down until you get a clear image with good separation between objects and the bottom. You want to be able to distinguish a log from a rock pile.
- Range: This setting determines how far out to each side your sonar beams extend. If you're in shallow water (under 15 feet), you might only need a 50-foot range to each side. In deeper water or when scouting large areas, you might crank it up to 100-150 feet or more. The general rule of thumb is to set your range to about 2-3 times the depth you're fishing. Don't go too wide; a wider range makes small objects harder to see. Many anglers find a good balance by keeping their range focused enough to clearly see important details.
Adjusting these settings isn't a "set it and forget it" deal. Conditions change, water clarity changes, and what you're looking for changes. Be prepared to constantly tweak your settings for the best possible view. It's a bit like tuning an old radio – you're looking for that perfect signal.
Learning to Read the Screen: Shadows, Hard Bottom, and Cover
This is where the magic really happens, and it takes practice. Side imaging displays structure in shades of gray, often with brighter returns indicating harder objects and darker areas indicating softer bottoms. But the real key to interpretation lies in the shadows.
- Shadows: When a sonar beam hits an object, it casts a "sonar shadow" on the far side of that object, just like a light casts a shadow. The longer the shadow, the taller the object. A small rock will have a short shadow, while a submerged tree will have a long, distinct shadow. Learning to recognize these shadows is crucial for understanding the height and shape of underwater features. If you see a bright return followed by a long, dark shadow, you know you've found something substantial, perhaps a pile of sunken timber or an old foundation. This is often where fish will ambush prey.
- Hard Bottom vs. Soft Bottom: Harder bottoms, like rock or gravel, will typically show up as brighter returns on your screen because the sonar energy bounces off them more efficiently. Softer bottoms, like mud or silt, absorb more sonar energy and appear darker. This is incredibly useful for distinguishing between a rocky point (bright return) and a muddy flat (dark return), which can be critical for species like walleye.
- Cover: Brush piles, weed lines, and even schools of baitfish will appear as distinct clumps or patterns on your screen. A dense brush pile will show a bright, irregular mass with a significant shadow behind it. A submerged weed line might appear as a textured, often brighter, band. Pay close attention to these features, as they are classic fish magnets. For example, if you're looking for crappie, a dense submerged brush pile at Branched Oak Lake or Lewis and Clark Lake will jump off the screen, often with fish returns visible right around or within the cover. You can even sometimes discern individual fish relating to the structure if your settings are dialed in. Remember, you can find a lot of great information on how to read a fish finder for walleye and other species by researching different techniques.
| Sonar Type | Primary View | Best For | Limitations |
|---|---|---|---|
| 2D Sonar | Direct view beneath boat | Finding fish directly below, bottom depth | Narrow coverage, poor detail of side structure |
| Down Imaging | Photographic view beneath boat | Detailed view of structure directly below | Narrow coverage, no side view |
| Side Imaging | Panoramic view to sides of boat | Scanning wide areas for structure & fish | Requires boat movement, can be harder to interpret |
Practical Applications for Finding Structure in Nebraska Waters
Side imaging truly shines when you're actively searching for those fish-holding spots that aren't visible above the surface. Nebraska's lakes and rivers are full of diverse structures, from natural rock formations to man-made cover, and side imaging helps you unlock them all.
Locating Submerged Timber and Brush Piles
Nebraska reservoirs often have areas of flooded timber, or local anglers create brush piles to attract fish. These spots are goldmines for crappie, bass, and even walleye. Driving over these areas with traditional sonar might show a blob directly underneath, but side imaging reveals the entire tree, its branches, and often the fish holding within or around it.
Imagine slowly trolling parallel to a submerged creek channel at Branched Oak Lake. On your side imaging screen, you might suddenly see the distinct bright returns of an entire stand of cedar trees extending 50 feet to your left, complete with their long shadows indicating their height. You can then mark that spot with a waypoint and turn your boat around to fish it precisely. Without side imaging, you might have just passed right by, completely unaware of the fish paradise just out of sight. You can even identify individual larger branches or sections of the timber where fish might be congregating, which is incredibly useful when figuring out how to catch crappie around brush piles. This kind of detailed reconnaissance is invaluable for anglers looking to stock their cooler or find that trophy fish.
Identifying Rock Piles, Humps, and Drop-Offs
Rock piles, humps, and steep drop-offs are classic feeding grounds for many game fish, especially walleye and smallmouth bass. These structures often hold baitfish, which in turn attract predators. Side imaging allows you to quickly sweep vast areas of a lake like Lake McConaughy or Sherman Reservoir to pinpoint these key features.
Instead of driving back and forth in a grid pattern with 2D sonar, you can make wide passes. As you traverse a large flat, your side imaging might suddenly illuminate a distinct, bright, irregular lump 70 feet to your right, with a clear shadow indicating it's a significant rock pile. You can mark it, investigate further with down imaging or 2D, and then position your boat perfectly to cast to it. Similarly, when approaching a shoreline, side imaging can show you subtle depth changes or a sharp drop-off extending away from the bank, indicating a prime ambush point for bass or walleye. This becomes extremely handy when trying to target specific areas for walleye fishing in Nebraska, providing an unfair advantage over those relying on older tech. Knowing the exact contours of the bottom can make all the difference, helping you anticipate where fish will congregate based on current and cover.
Pinpointing Weed Lines and Transition Zones
Fish often relate to the edges of weed beds and areas where different types of bottom meet (transition zones). These are prime areas to explore, and side imaging gives you a clear picture of these underwater habitats.
When you're scanning a shallow bay, side imaging can show you the distinct boundary where a healthy, green weed bed ends and gives way to open water, or where sparse weeds transition into a thick mat. Fish often patrol these edges, using them for cover and as ambush points. Similarly, side imaging excels at showing transition zones – areas where a hard, rocky bottom might give way to a soft, muddy flat, or where a sand bottom meets gravel. These subtle changes can be super attractive to fish, and side imaging makes them easy to spot from a distance. You can then adjust your casting angles or trolling paths to perfectly target these productive edges. For anyone looking to understand the diverse aquatic habitats in Nebraska's bodies of water, this level of detail is a true eye-opener.
Tips for Maximizing Your Side Imaging Success
Side imaging is a powerful tool, but like any skill, it improves with practice and understanding. There are a few key habits and techniques that will help you get the most out of your unit and put more fish in your boat. Don't be afraid to experiment!
The Importance of Slow Boat Speed and Grid Searches
Trying to use side imaging while zipping across the lake is like trying to read a book while driving a car at highway speeds – you're just not going to get the full picture. Side imaging requires a slow, consistent boat speed, typically between 2 and 5 mph, depending on your unit and settings. This allows the sonar beams to collect enough data to paint a clear, un-stretched image. If you go too fast, the image will be elongated and distorted, making it hard to identify specific features.
When you're exploring a new area, adopt a systematic approach: the "grid search." Start at one end of the area you want to scout and make parallel passes, overlapping your side imaging beams by about 20-30%. This ensures you cover the entire area thoroughly without missing anything. As you make each pass, keep a keen eye on your screen for anything interesting – a hump, a log, a bait ball. When you spot something, mark a waypoint immediately. This disciplined approach ensures you don't miss any hidden gems, especially in larger bodies of water. Think of it like mowing a lawn; you want to cover every strip to ensure nothing is missed. You can find many fishing electronics, including advanced fish finders, on Amazon that can greatly assist with this kind of systematic search.
Integrating Side Imaging with Other Sonar Views
While side imaging is fantastic for finding structure, it’s not meant to be used in isolation. It works best when integrated with your other sonar views, like 2D sonar and down imaging. Think of it as a three-pronged attack on the underwater world.
- Side Imaging for Scouting: Use side imaging as your primary scouting tool. When you enter a new area, use side imaging to sweep wide swaths of water, quickly identifying potential fish-holding structure like those submerged trees or rock piles. It helps you cover a large area efficiently, allowing you to quickly dismiss unproductive water and focus on the promising spots. This is also a good opportunity to review your "Best Fish Finders for Nebraska Lakes" options, many of which now integrate all these technologies seamlessly.
- Down Imaging for Detail: Once side imaging has revealed a piece of structure, switch to down imaging (or split your screen to include it) as you approach the waypoint you marked. Down imaging will give you a more detailed, photographic view of that specific structure directly beneath your boat. You can then confirm what side imaging showed you and even see individual fish relating tightly to the cover.
- 2D Sonar for Fish Arches: After you've identified and refined your target with side and down imaging, use traditional 2D sonar to confirm the presence of fish and understand their depth. While side imaging and down imaging can show fish, 2D sonar is still often the best for producing those classic "fish arches," especially for actively schooling fish. Many anglers rely on 2D for its robust performance in a variety of conditions, particularly for seeing how fish are positioned in the water column.
By combining these views, you get a complete picture: side imaging shows you where the structure is, down imaging shows you what the structure is and how fish are relating to it, and 2D sonar helps you confirm the presence and depth of the fish themselves. This synergy will drastically improve your success rate on the water, turning an ordinary fishing trip into a truly productive one. Don't forget to consider a good pair of polarized sunglasses available on Amazon to help you spot surface activity related to these underwater structures! For more general angling knowledge, check out our guide on Nebraska Fishing Regulations Explained.
Disclaimer
This article is for general informational purposes only and does not constitute professional advice. Laws, prices and regulations vary by location and change over time. Consult a qualified professional for guidance on your specific situation.