How to Clean and Fillet a Channel Catfish
There’s nothing quite like reeling in a hefty channel catfish from a Nebraska lake or river. That feeling of the line singing, the powerful tug, and the ultimate victory of landing a true whiskered warrior. But once you’ve got that beautiful catch on the bank, a different kind of challenge begins: transforming it from a slimy, spiny creature into delicious, ready-to-cook fillets. Many anglers, myself included, have stood over a fresh catfish, a little intimidated by its tough skin and sharp fins. This guide is here to walk you through the entire process, demystifying how to clean and fillet a channel catfish so you can enjoy the fruits of your labor without the fuss.
Why Fillet a Channel Catfish? The Joy (and Challenge) of Fresh Catfish
Channel catfish are one of Nebraska's most popular game fish, and for good reason. They're abundant, fight hard, and are absolutely fantastic on the dinner table. But getting them from the water to the plate can feel like a daunting task, especially if you're new to it.
The Delicious Reward
The meat of a channel catfish is mild, flaky, and incredibly versatile. It holds up well to grilling, frying, baking, or even smoking. A freshly caught and properly filleted catfish, lightly breaded and fried golden brown, is a classic taste of Nebraska summer. Imagine a shore lunch after a successful morning of fishing on the Platte River, or a family dinner featuring fillets from a Branched Oak Lake Catfish Fishing trip. The difference between store-bought and fresh-caught is night and day, making the effort of cleaning and filleting truly worthwhile. It’s not just about the meal; it’s about the full experience of harvesting your own food and sharing it with loved ones.
Facing the Cleaning Challenge
Let's be honest, channel catfish aren't exactly the cleanest fish to deal with. Their skin is tough and slimy, they have those incredibly sharp dorsal and pectoral fins that seem to jump out at you, and their thick bones can make filleting feel like a wrestling match. These characteristics are precisely why many anglers shy away from cleaning their own catfish, opting instead to release them or take them to a professional processor. The slime helps them navigate murky waters and evade predators, but it makes them a challenge to hold securely. And those spines? They're formidable defenses, capable of delivering a nasty poke if you're not careful. This initial hurdle is often the biggest barrier, but with the right tools and technique, it's easily overcome.
Essential Tools for Filleting a Channel Catfish
Having the right equipment is half the battle when it comes to cleaning fish. Skimping on tools will only add frustration and potentially compromise the quality of your fillets. Invest in a few key items, and the process will become much smoother and safer.
Your Fillet Knife Arsenal
A good fillet knife is your most important ally. You need something sharp, flexible, and comfortable in your hand. While you can technically get by with a regular kitchen knife, a dedicated fillet knife makes all the difference.
- Manual Fillet Knives: Look for a blade length between 6 and 9 inches, depending on the size of the catfish you typically catch. A flexible blade allows you to hug the bone structure, minimizing wasted meat. Brands like Dexter-Russell or Rapala are popular among anglers. Ensure it's razor-sharp; a dull knife is more dangerous than a sharp one because it requires more force, increasing the risk of slips. You can find a wide selection of quality manual fillet knives on platforms like Amazon, often with protective sheaths.
- Electric Fillet Knives: For those who clean a lot of fish or tackle larger specimens, an electric fillet knife is a game-changer. It makes quick work of tough skin and bones, greatly reducing effort and fatigue. They're particularly useful for larger channel cats where manual effort can be considerable. Just remember to have a power source nearby, or opt for a cordless model. These can be a fantastic investment, and a quick search on Amazon will show you many highly-rated options from brands like Bubba Blade or Rapala. The vibrating action makes clean cuts through dense flesh, which is especially beneficial when dealing with the robust skeletal structure of a large catfish.
The Supporting Cast of Gear
Beyond your primary knife, a few other items will make the job much easier and cleaner.
- Cutting Board: A sturdy, non-slip cutting board is essential. A large plastic one is ideal, as it’s easy to clean and won’t absorb odors. Some cutting boards designed for fish even have clamps to hold the tail, which is incredibly helpful for maintaining control of a slippery catfish.
- Heavy-Duty Pliers or Catfish Skinner: For skinning catfish, pliers are almost a necessity. Their tough skin is notoriously difficult to remove by hand. Heavy-duty pliers or a specialized catfish skinning tool (often available on Amazon) provide the grip and leverage needed to peel the skin away efficiently.
- Cooler with Ice: Keep your catfish on ice right up until you’re ready to clean it. This maintains the quality of the meat and makes the fish easier to handle, as rigor mortis will have set in. After filleting, the finished fillets should go straight into another cooler of ice or an ice bath to keep them fresh.
- Sharpening Steel or Stone: Even the best knives get dull. A quick touch-up with a sharpening steel or stone before you start and periodically during a long cleaning session will keep your blade performing optimally. Remember, sharpness equals safety and efficiency.
- Gloves: Cut-resistant gloves can provide an extra layer of protection against those sharp fins and accidental knife slips, especially for beginners. Latex or nitrile gloves can help with grip on slimy fish and keep your hands cleaner.
| Tool Type | Pros | Cons | Best For |
|---|---|---|---|
| Manual Fillet Knife | Precision, control, portable, no power needed | Can be tiring for many fish, requires good technique and sharpness | Occasional anglers, smaller to medium fish |
| Electric Fillet Knife | Fast, reduces fatigue, handles tough skin easily | Requires power, less precise for delicate cuts, can be noisy | Processing many fish, larger, tougher fish |
| Heavy-Duty Pliers | Excellent grip for skinning, durable | Not specialized for skinning, can rip meat if not careful | General skin removal for catfish |
| Catfish Skinner | Designed specifically for catfish skinning, efficient | Single-purpose tool, takes practice to master | Dedicated catfish anglers |
Step-by-Step Guide to Cleaning and Filleting
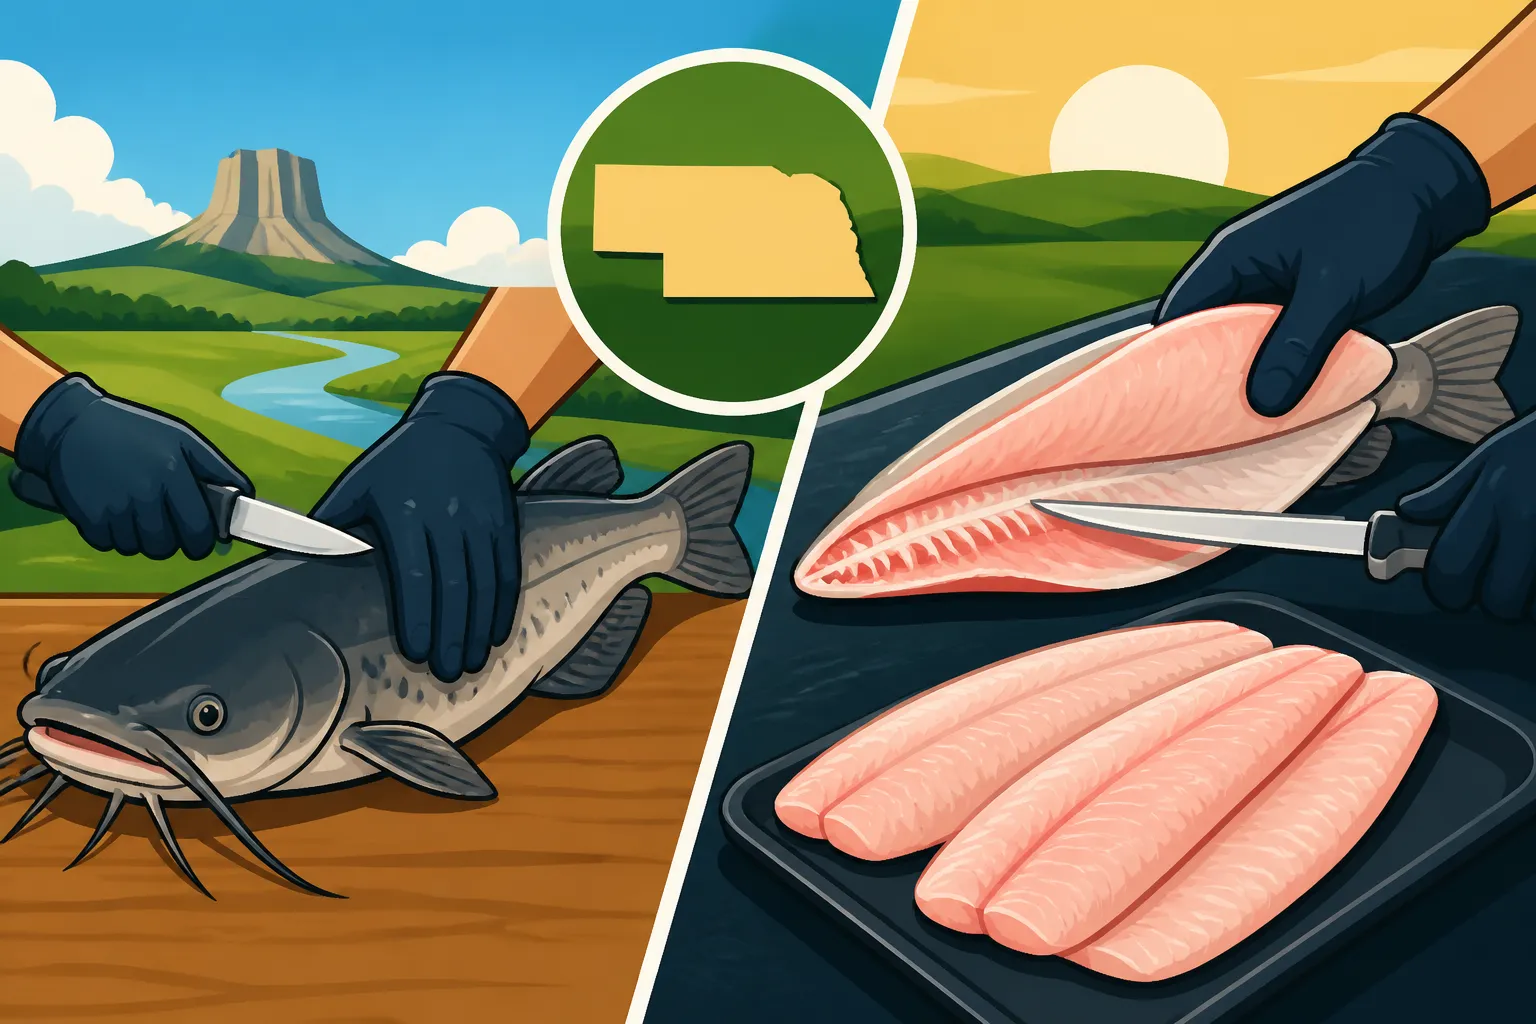
Now that you have your tools ready, let’s get down to the actual work. Cleaning and filleting a channel catfish can be broken down into manageable steps, making the process less intimidating.
Preparing Your Workspace and Your Catch
Before you even touch a knife, make sure your cleaning station is set up for success. This means having good lighting, a stable surface, and easy access to a water source for rinsing.
- Keep it Cold: Your catfish should be as cold as possible. If you just caught it, put it on ice immediately. This not only preserves the meat but also helps stiffen the fish, making it easier to handle and cut precisely. Many anglers will bleed the fish immediately after catching it for better meat quality, which involves making a small cut behind the gills and letting it bleed out in a bucket of water or on ice.
- Secure Your Workstation: Place your cutting board on a stable surface, ideally one that can be easily washed down. If your board slides, put a damp towel underneath it. Have a bucket for scraps and another with ice water for finished fillets.
- Safety First: Before you even begin, understand where the sharp fins are. The dorsal fin (on the back) and pectoral fins (behind the gills) are incredibly sharp and can deliver a painful puncture. Handle the fish firmly but carefully to avoid these spines. Some anglers trim these fins off with heavy shears before starting, which is a good safety measure, especially if you're new to the process.
The Skinning Process: A Sticky Situation
Removing the tough, slimy skin of a channel catfish is often considered the hardest part. There are a couple of popular methods, and practice will help you find what works best for you.
- The Head-Cut Method (Pliers/Skinner):
- Secure the Head: Lay the catfish on its side. Using a heavy knife (not your fillet knife), make a deep cut just behind the head, cutting downwards until you hit the backbone. Do not cut through the backbone. This initial cut creates a starting point for skinning.
- Grip the Skin: With your heavy-duty pliers or catfish skinner, firmly grip the skin at the edge of this cut, right behind the head. You want a good, strong hold on the skin itself, not the flesh.
- Pull and Peel: Here’s where the fun begins. While holding the fish down with one hand (carefully, avoiding spines), use the pliers to pull the skin away from the body. Pull towards the tail, using a steady, strong motion. You might need to make small relief cuts along the side with your knife to help separate the skin from the meat, especially on larger fish. This process can be tough, but once you get a good strip started, it often peels off surprisingly well. You’ll want to pull the skin all the way down to the tail. Repeat this on the other side.
- The Fin-Cut Method: Some anglers prefer to remove the fins first to make handling safer. After trimming fins, you can still use the plier method, starting the skin peel from the cleaned fin area. For smaller catfish, sometimes you can get away with simply scoring the skin along the back and belly, then using pliers to peel it in sections. Regardless of method, the goal is to get all that tough outer layer off, leaving you with clean, white flesh. It's truly a messy job, but a clean skinning job means a better fillet later.
The Filleting Cuts: Precision is Key
Once skinned, the catfish is much easier to work with. Now it's time to separate that delicious meat from the bone.
- First Cut – Behind the Gill Plate: Lay the skinned catfish on its side. Take your sharp fillet knife and make a deep, downward cut just behind the gill plate, all the way to the backbone. Do not cut through the backbone yet. You want to feel your knife hit the spine.
- Second Cut – Along the Backbone: Turn your knife flat, parallel to the backbone, and begin to slice horizontally along the top of the backbone, working your way from the head towards the tail. Keep the blade pressed against the bone to maximize meat yield. You'll feel the blade glide over the ribs. When you get to the tail, cut through the meat, but leave a small "hinge" of skin (if you skinned this way) or meat attached to the tail. This hinge can help you flip the fillet over for the next step.
- Separating from the Rib Cage: Now, with the fillet still attached by the tail hinge, gently lift the fillet away from the fish. You'll see the rib cage. Angle your knife slightly downwards and carefully slice along the top of the rib bones, separating the meat from the ribs. Again, keep the blade close to the bone. This will produce a boneless fillet.
- Remove the Hinge and Repeat: Once the rib cage meat is removed, cut the fillet free from the tail hinge. Now you have one beautiful, boneless fillet. Flip the fish over and repeat the entire process on the other side to get your second fillet. For very large channel catfish, you might consider taking off the "backstrap" first, which is the thickest part of the fillet, then working around the rib cage.
Final Touches and Storage
You're almost there! A few last steps ensure your fillets are perfect for cooking.
- Rinsing and Trimming: Rinse your fillets under cold water to remove any remaining scales, slime, or blood. Pat them dry with a paper towel. Inspect them for any small bones (pin bones) or dark spots (bloodline or fatty tissue) and trim them away. While catfish don’t have as many troublesome pin bones as some other species, a quick feel with your fingers will confirm if any remain. Trimming any dark red meat along the lateral line can improve the flavor profile, as this part can sometimes have a stronger, "fishier" taste.
- Preparing for Cooking or Storage: At this point, your fillets are ready to be cooked immediately. If you’re not cooking them right away, proper storage is crucial.
- Refrigeration: Place the cleaned and dried fillets in a sealed container or zip-top bag with ice. They can be safely stored in the refrigerator for 1-2 days.
- Freezing: For longer storage, vacuum-seal the fillets or place them in freezer-safe bags, removing as much air as possible. You can also cover them in water in a freezer container to prevent freezer burn, creating a block of ice around the fish. Label with the date. Frozen catfish fillets can maintain their quality for several months. For tips on when and where you can catch these fish, check out Nebraska Fishing Seasons Explained or Nebraska Fishing Daily Bag and Possession Limits.
Tips for Success and Common Pitfalls to Avoid
Cleaning a channel catfish gets easier with practice. Here are some extra tips to help you along your way and avoid common mistakes.
Making the Job Easier
There are always little tricks that seasoned anglers use to streamline the cleaning process.
- Sharpen, Sharpen, Sharpen: I can't stress this enough. A sharp knife is not only more efficient but also much safer. Dull knives require excessive force, leading to slips and potential injury. Keep a sharpening stone or steel handy, and give your blade a few passes before and even during your filleting session. For great sharpening tools, you know where to look.
- Watch and Learn: If you’re a visual learner, there are countless videos online demonstrating catfish cleaning techniques. Seeing the cuts in action can really help clarify the written steps. Look for demonstrations using the type of knife (manual or electric) and fish size you plan to tackle.
- Practice Makes Perfect: Don't get discouraged if your first few attempts aren't perfect. You might lose a little meat or struggle with the skin. Every fish you clean will build your confidence and refine your technique. Start with smaller catfish if you can, as they are a bit less intimidating. Before you know it, you’ll be a pro at filleting! This experience gained from handling various fish will also come in handy if you try your hand at How to Clean and Fillet a Crappie or even a How to Clean and Fillet a Walleye.
- Work with Fresh Fish: The fresher the fish, the easier it is to clean. As fish sit, their flesh can soften, making it harder to get clean cuts and increasing the sliminess. Get them on ice and process them as soon as reasonably possible after catching.
Safety First
Those spines are no joke, and a sharp knife demands respect. Prioritize safety above all else.
- Beware of the Spines: Always be mindful of the dorsal and pectoral fins. They are incredibly sharp and can inject a mild venom, causing a painful sting. Consider trimming them with strong shears before you start skinning or wear cut-resistant gloves. Always keep your free hand well clear of the knife's path.
- Stable Surface: Ensure your cutting board and work surface are stable and won't slide around. This prevents sudden movements that could lead to accidents.
- Knife Control: Always cut away from your body. Use a firm but controlled grip on both the knife and the fish. Never rush the process, especially when making critical cuts near bones.
Maximizing Your Yield
Getting as much edible meat off the fish as possible is a goal for every angler.
- Hug the Bones: The key to maximizing yield is to keep your knife blade pressed firmly against the backbone and rib cage as you slice. You want to literally feel the bones guiding your knife. This ensures you leave very little meat behind.
- Check for Leftovers: After filleting, don't just toss the carcass. Sometimes there's a surprising amount of meat left on the belly flaps or cheek areas, especially on larger fish. These smaller pieces are great for fish tacos or adding to a fish stew.
- Consider Smaller Fish Whole: For very small channel catfish, under a pound or so, some anglers prefer to clean them whole rather than fillet them. This involves scaling, gutting, and removing the head and fins, then cooking the whole fish. While not strictly filleting, it's an option for smaller catches where filleting might be too fiddly. When dealing with specific sizes, it’s always good to remember the Nebraska Channel Catfish Daily Limit rules.
Cleaning and filleting your own channel catfish is a rewarding skill that enhances the entire fishing experience. It's about more than just getting dinner on the table; it’s about connecting with your catch and taking pride in the journey from water to plate. With a little practice and the right tools, you'll be filleting like a pro in no time, ready to enjoy some of the best-tasting fish Nebraska has to offer!
Disclaimer
This article is for general informational purposes only and does not constitute professional advice. Laws, prices and regulations vary by location and change over time. Consult a qualified professional for guidance on your specific situation.